Are you looking for a creative way to salvage wood from a recent restoration or remodeling project? Whether it’s a creative decoration or a small addition of furniture for your home, these weekend projects only take a few hours and offer long-lasting enjoyment and warmth to your home.
Try some of these simple, do-it-yourself weekend woodworking projects.
Snazzy Wooden House Number Plaque
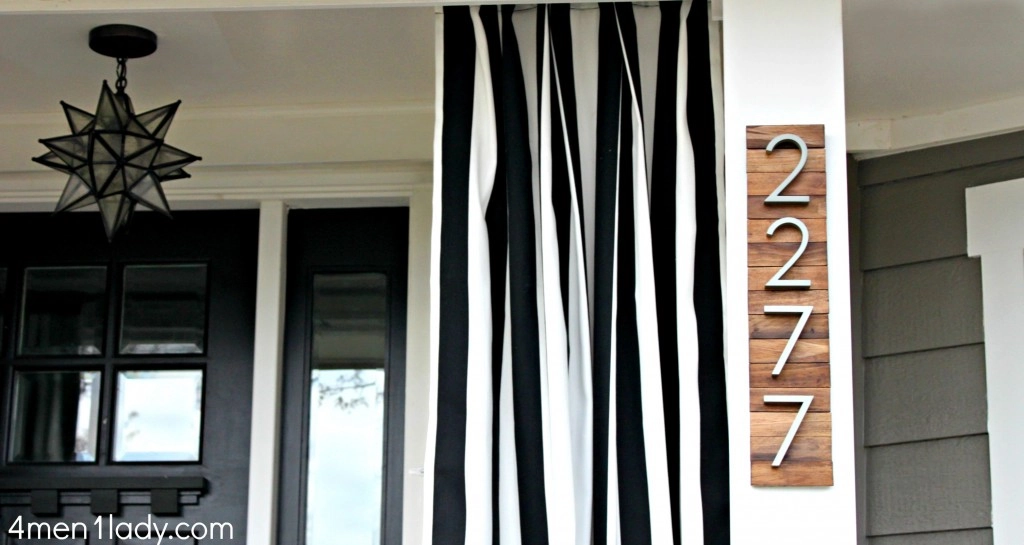
If you’ve had a recent paint project, use the extra wooden paint stirs to create a house number plaque that will add appeal to the front of your home. Select a solid piece of salvaged wood for the base. Cut the paint stir sticks into equal lengths and stain them with a wood finish of your choice. Using wood glue, stick the wood pieces to your salvaged wood base. Let dry. Purchase the numbers for your address at a local hardware store. Select numbers that will stand out on your base. Glue or attach the numbers to the wooden base. Hang the house number plaque in a visible location and get ready for the compliments.
 Photo courtesy of 4men1lady.com
A Lil’ Bit of Country Candle Holder
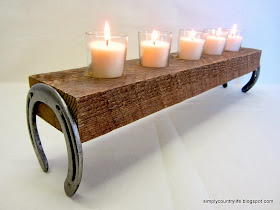
Bring a little country charm alive in your home or outdoor space with this simple candle holder. Find a two-foot long piece of thick salvaged wood. Buy some inexpensive candle votives at a local craft store. Ask a local farmer if they have two horseshoes you could have or get them at a local farm store. Stain the piece of wood and drill out the holes to place the votives. It’s always good to mark the spots you want the candles to be placed. Attach the horseshoes to each end of the wood piece to serve as the legs of your candle holder. Then, place your favorite scented candles in the votives and enjoy the candlelight in your new wooden candle holder.
Photo courtesy of simplycountrylife.blogspot.com
Stunning Wooden Picture Frames
Ever thought of displaying your pictures in a creative way by making picture frames from salvaged wood? This is a fun, easy project that will look great in your home. Select wood pieces and trim to the size you want. Lay a few pieces of the wood side-by-side like a picket fence and attach a horizontal piece of wood to the back using a drill and wood screws. Select a paint color or wood stain and apply to the wood. Once dry, attach a bulldog clip found at your local office supply store to the upper center of your wooden frame. Attach a saw tooth frame hanger from the local hardware store to the back of your frame to hang on the wall or simply lean the frame on the wall on your mantel or bookshelf. Clip your favorite picture in the bulldog clip and change out the photos as often as you like.
Smashing Dining Chair Bench
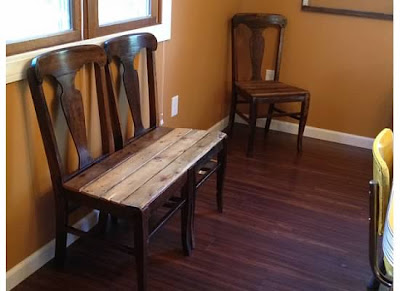
Do you need to add more seating to your dining room or living room? Using two old dining table chairs found inexpensively at a local flea market, you can create a one-of-a-kind bench that everyone will love. Once you have your chairs, remove the seat portion of the chairs. Attach the two chairs together at the top of the chair back and at the legs using wood screws. Find sturdy salvaged wood pieces to form the seating base of the bench. Trim and sand the wood to remove rough areas. Attach the pieces of wood to the chair base with wood screws. Paint or stain the bench seat to match your décor. You might also consider placing a pillow cushion on the seat for comfort.


